Session 01
Introduction
Installation of PyCharm IDE for Python
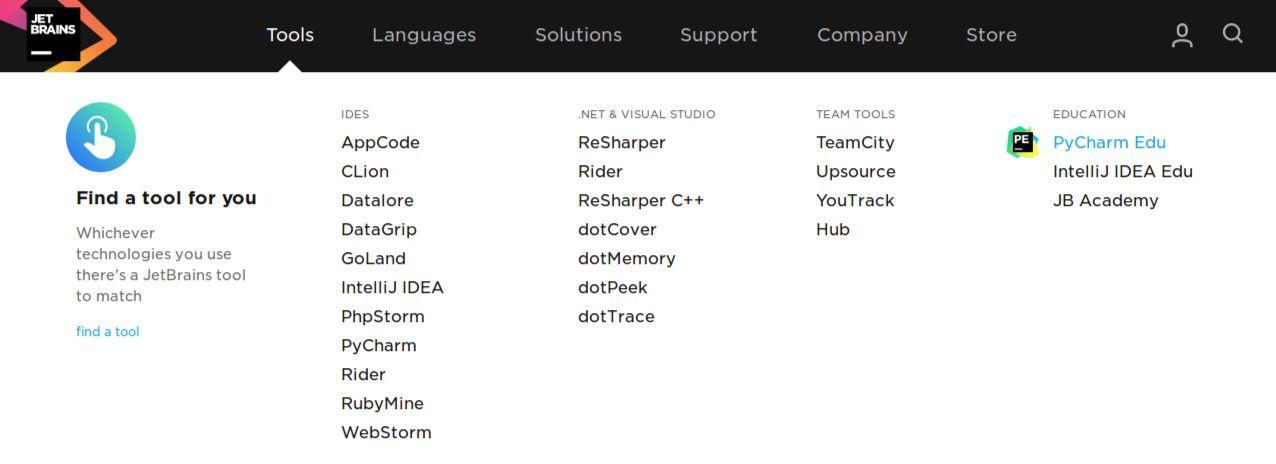
Using http://jetbrains.com/, we can download free and open-source Education version of PyCharm:

Under the Tools menu, we choose Education –> PyCharm Edu
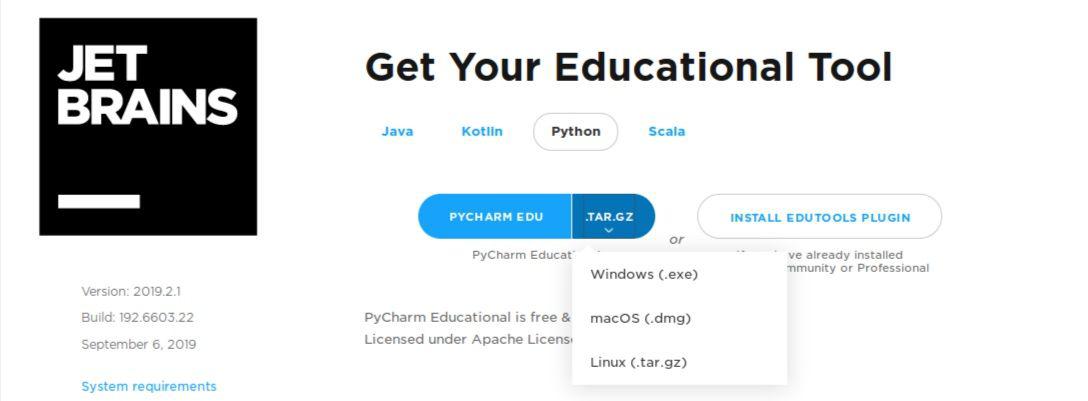
Click on download:

You can choose PyCharm download according to your personal OS:
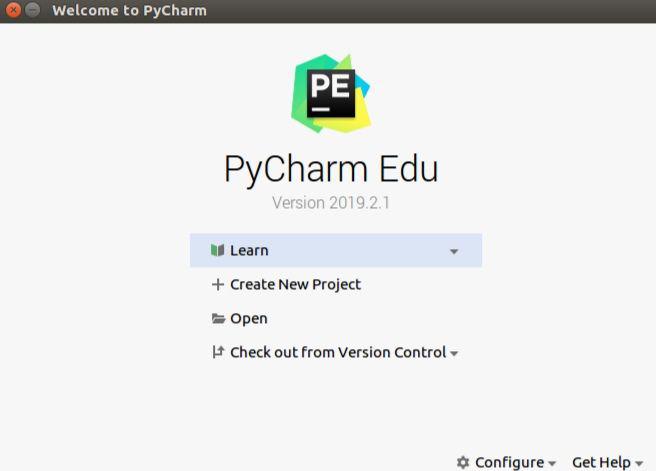
Once you downloaded required version, you can install it to your computer.
Create New Project –> Location: change untitled to any title (e.g. IT2) –> Create a virtual environment:
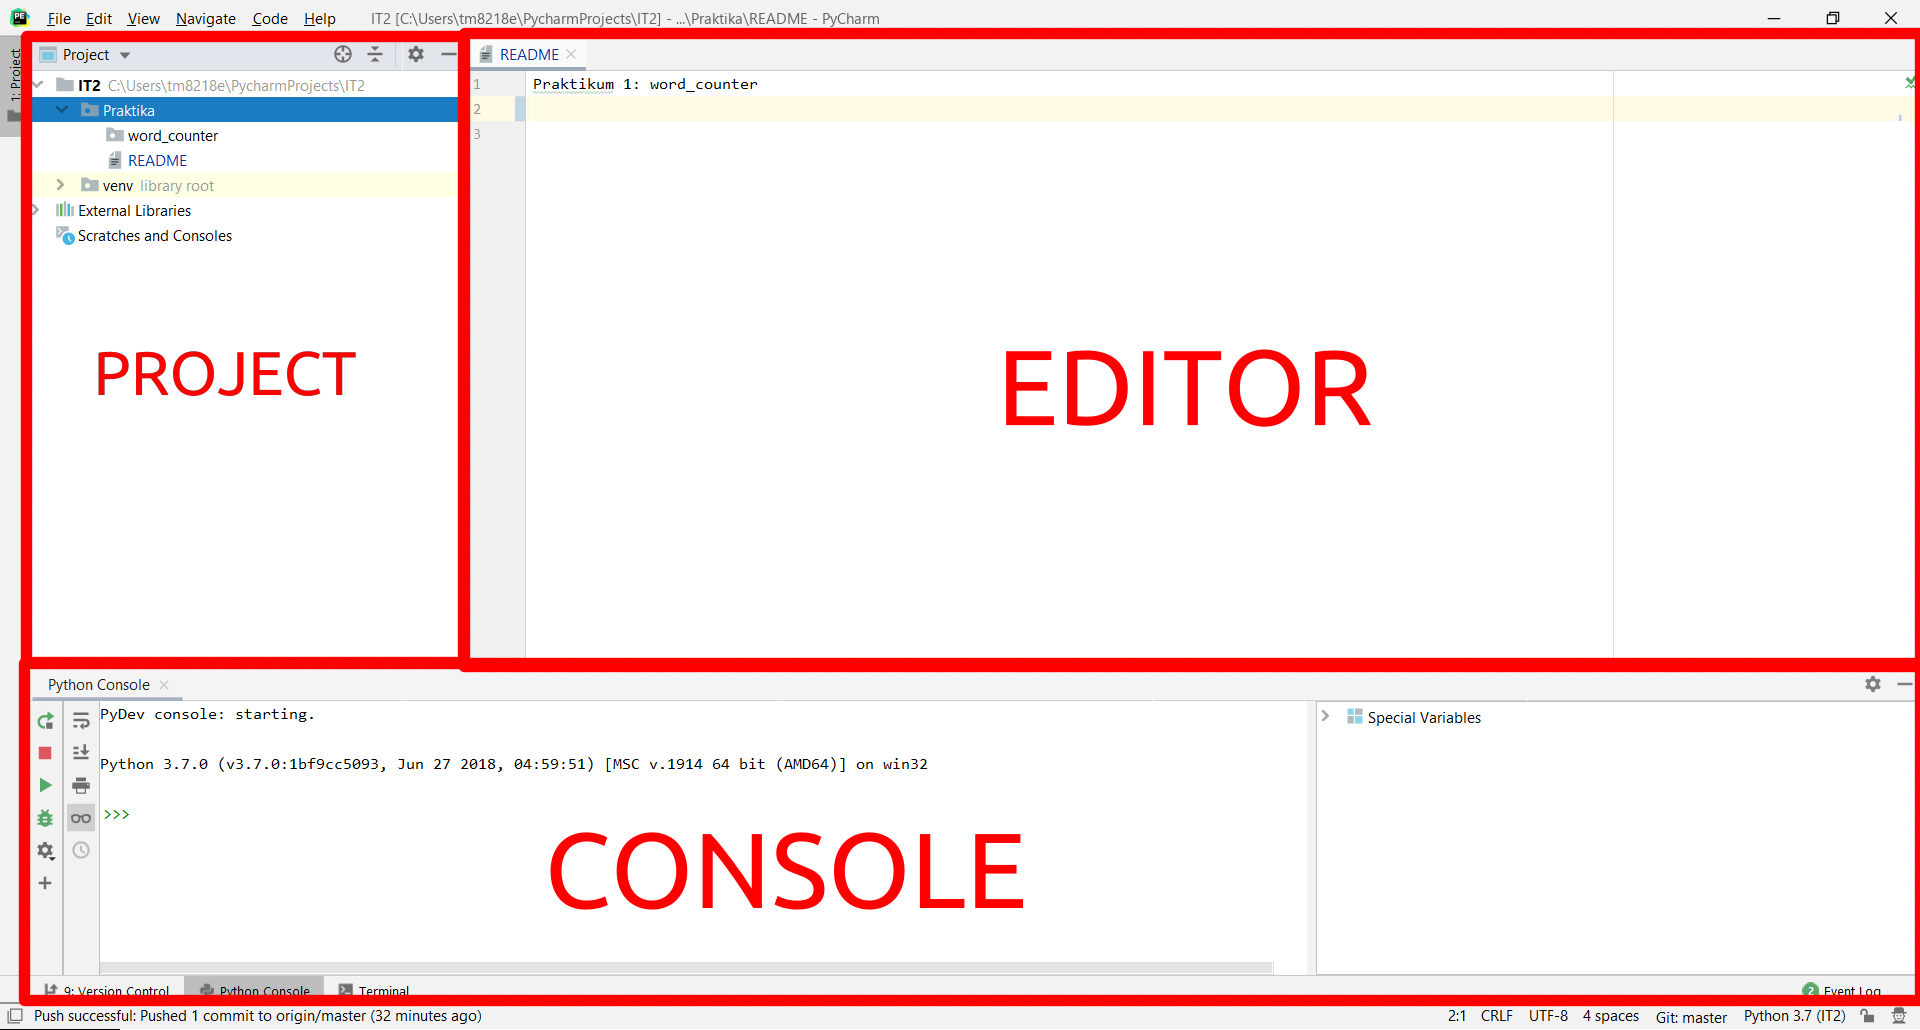
On the upper left you see the files inside of your project.
Create a subfolder and call it how you want (e.g. Praktika).
You will create your source code in seperate folders under this subfolder.
Create a README file and describe your project with some words.
Congratulations, the first task is done and PyCharm is successfully installed
Git, GitLab and PyCharm
Here, you will learn how to integrate GitLab with PyCharm, push and pull the contents in PyCharm and get an access to all codes and other files, relating the tutorials.
Installation
Visit https://git-scm.com/downloads and install Git for your OS.
Registration
Visit to FH Aachen version of gitlab http://git.fh-aachen.de and sign in with your personal FH-Kennung and password.
Search group called Group Uno. Project name is mascor-python-project.
Here, you can refer to WordCounter folder where you can download python files from the tutorial.
Create a new repository in GitLab
Here, we will learn how to create our personal Gitlab repository.
Sign in http://git.fh-aachen.de and go to GitLab menu. On the top right hand side you can see New Project.
Press it and create a new project. Give your own project name, let us say, it2_praktika.
Choose a Visibility Level as Public, so that the project can be accessed without any authentication. No need to initialize repository with a README.
Press Create project. After a successful creation a new repository in GitLab, you see instructions how to initialize the repository. We will use them in next section.
Now we can move to PyCharm to learn how to commit, push and pull the files.
Pushing and pulling the contents
After creating a new project on GitLab, we go to PyCharm.
Search Plugins in PyCharm’s Settings menu. Then, search for GitLab Projects and install it.
You will be prompted to restart PyCharm.
Now, once PyCharm is re-loaded, go to Version Control --> GitLab in the Settings menu.
Enter the URL https://git.fh-aachen.de/ in GitLab Server Url.
Now you have to fill in the GitLab API Key. To do this you have to paste in your personal access token provided by GitLab. If you do not know it, simply log into your GitLab account, go to settings -> account -> access tokens.
Simply create a new one (make sure you select for api). Copy the generated token key and paste in the respective settings field in PyCharm as mentioned earlier.
Set prefferred checkout method to HTTPS.
Press apply and ok, now you are set to go.
Once you created a new project in PyCharm, now it is time to commit. Open terminal in PyCharm and paste the instructions from the main page of your GitLab project:
git config --global user.name "Your USERNAME"
git config --global user.email "Your EMAIL"

cd "PRAKTIKA SUBFOLDER" # If necessary --> we don't want to have binary files from "venv" in our repo.
git init
git remote add origin https://git.fh-aachen.de/"YOUR LOGINNAME"/"YOUR REPO NAME".git
git add .
git commit -m "Initial commit"
git push -u origin master
Then, if you refresh your GitLab page, you can now see your Pycharm project.
Now let us create a new python file and call it test.py. We learn how to save this file directly to Git repository.
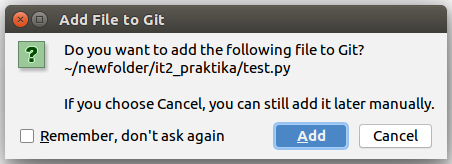
Once you create a file New --> Python File, there is a pop-up menu, where you are asked to add a file to Git. By pressing Add, you automatically add it to Git:
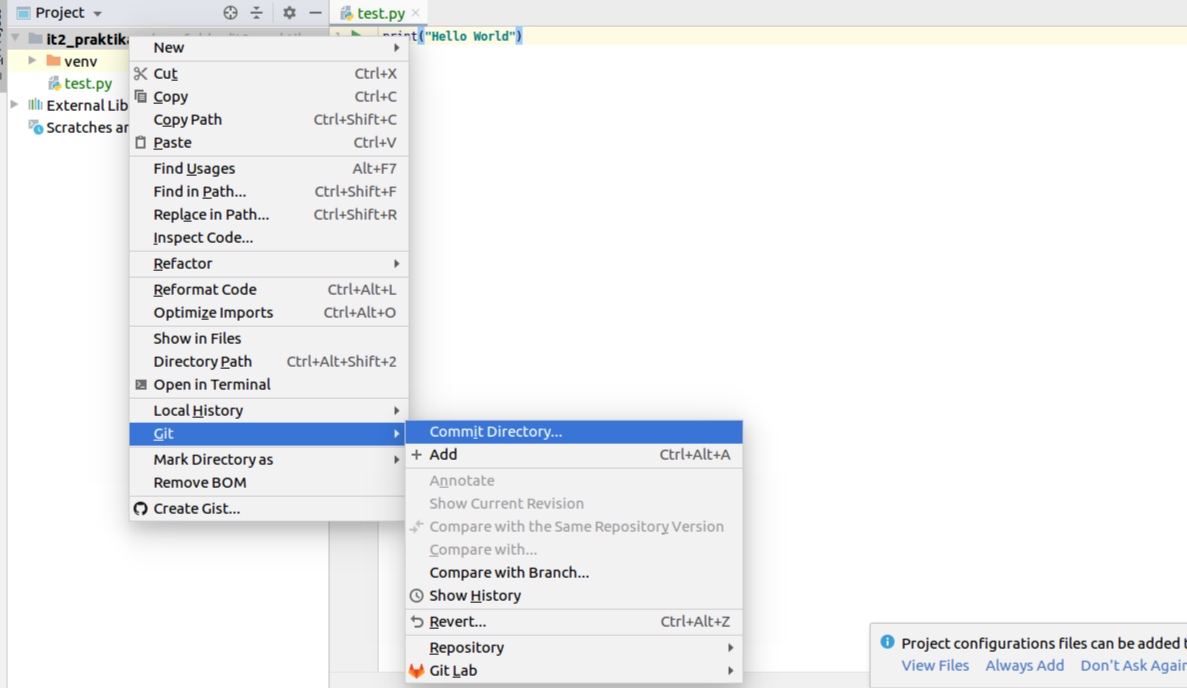
Once you added it, you have to commit it (an individual change to a file). We can do it either by pressing Ctrl + K or right click of mouse on project folder or actual file, Git-->Commit directory (or file):
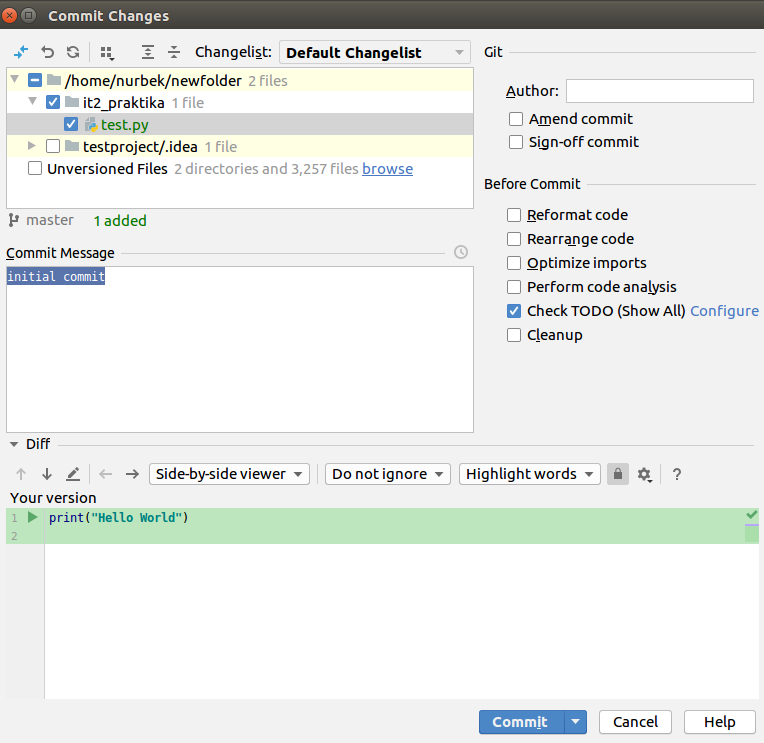
During the commiting process, you have to choose the file you are working with (if it is not checked) and write any commit message. Press Commit:
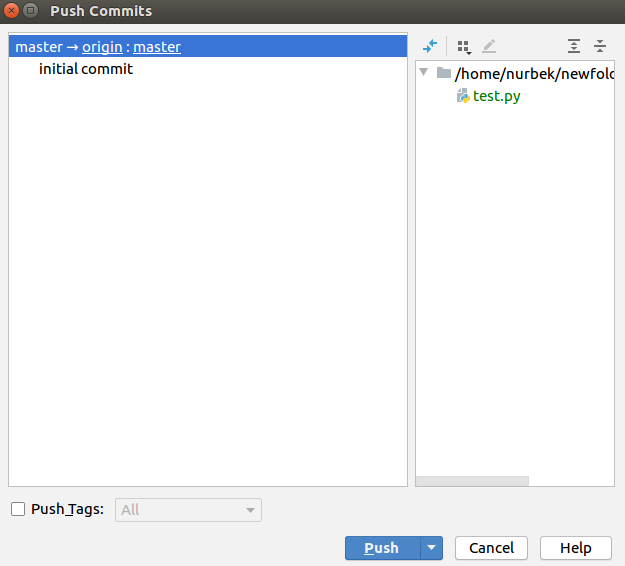
Once you commited the file or directory, press again either CTRL + SHIFT + K or right click of mouse on project folder or actual file, Git --> Repository --> Push:
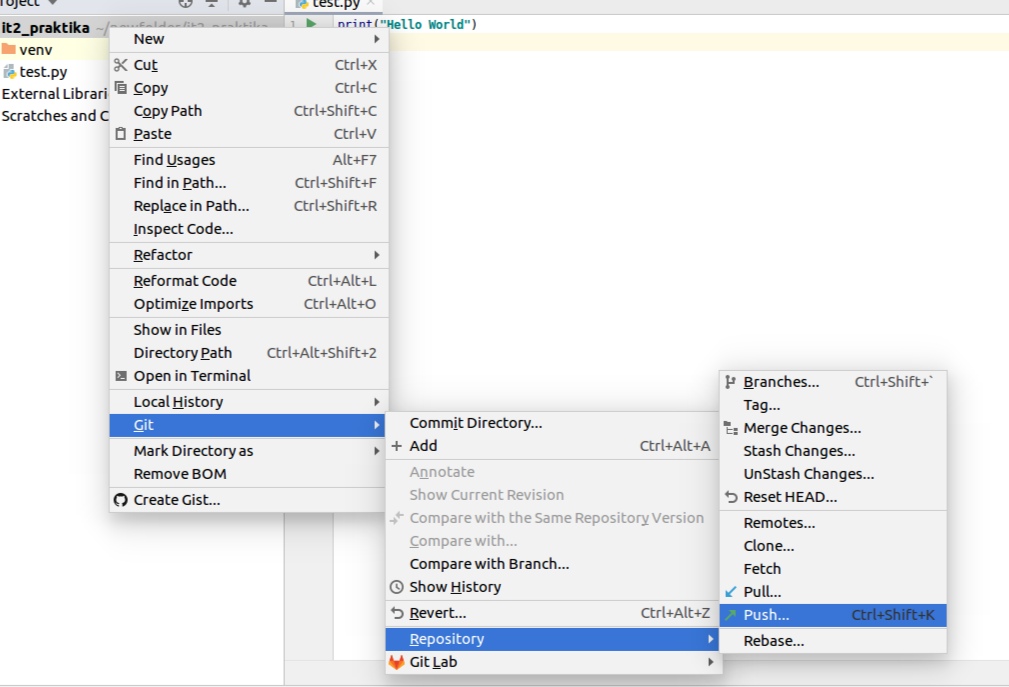
Then push it:
After refreshing your GitLab page, you can see that a new content is added.
There is an alternative way to add a file to Git. Once you have finished with test.py, use following codes in the terminal of PyCharm:
cd existing_folder
git add . # Just once for new files. Not for changes.
git commit -m "second (third, fourth, etc.) commit"
git pull origin master
git push -u origin master
Now, we move to our first tutorial called Word Counter in Python. There, you have to push each python file you created directly to git repository using the same rules we have seen above.
Word Counter in Python
Read and print file
We are going to build a code that gets the number of lines or words in a file. It is more interesting than just printing hello world to the screen. So, how can we do it?
Create a new folder in Praktika. Call it word_counter.
We are working with a python file read_file.py, which you can also find it in WordCounter folder inside the gitlab repository:
#!/usr/bin/python

f = open("birds.txt", "r")
data = f.read()
f.close()

print(data)
Let’s start looking to the code:
The first line in this file is called “shebang” line and it starts with #! (! is called the “bang” and # is called “hash”). When you execute a file from the shell, the shell tries to run the file using the command specified on the shebang line. It also tells which interpreter to use (Python in our case).
Shebang line will be ignored by Python by default (# defines a comment in Python).
Working with text files is easy in Python. The first step is to create a file object corresponding to a file (birds.txt in our case) on disk. This is done by using the open function. Usually a file object is immediately assigned to a variable like this:
f = open ("birds.txt", "r")
# <variable> = open (<name>, <mode>)
We simply open a file called birds.txt. It must exist in the current directory (i.e., the directory you are running the code from). The r means the file will be opened in a read only mode.
Hint
Another mode parameters are w for writing to the file and a for appending to the file.
After opening the file, we read its contents into a variable called data and close the file:
data = f.read()
f.close()
Afterwards, we print the file:
print(data)
After running the file, we get:
STRAY BIRDS
BY
RABINDRANATH TAGORE

STRAY birds of summer come to my
window to sing and fly away.

And yellow leaves of autumn, which
have no songs, flutter and fall there
with a sigh.
Now, we can read a file and print it on the screen. Our first python program is done.
Count words and lines
In this part, our task is to count the number of words. There is count_words.py file in the WordCount folder.
Until now, we are able to open the file and read it. These lines should be clear for everybody:
#!/usr/bin/python

f = open("birds.txt", "r")
data = f.read()
f.close()
There are several built-in functions for strings (textual data) in Python. One of them is the split() function, which splits the string on the given parameter.
Split operation turns the original string into a list of several substrings, using a certain character to split on as a parameter:
words = data.split(" ")
Here, we are splitting the data on a space. The function returns a list of substrings of the string split on a space.
First, we take a sentence “I am a boy” and split it on an empty step between the words, in other words on a space. Python returns a list with four elements:
In: "I am a boy".split(" ")
Out: ['I', 'am', 'a', 'boy']
We take another sentence “The birds, they are flying away, he said”. This time, we split it on a comma. Python should return a list of three substrings:
In: "The birds, they are flying away, he said".split(",")
Out: ['The birds', 'they are flying away', 'he said']
We should understand what we are doing actually. We are splitting the file on spaces or commas or whatever character. This gives us the number of words, as in English, words are separated by a space.
We print the words what we found:
print("The words in the text are:")
print(words)
Next, we call another function len(), which returns the length of a list. We will be able to find out how many elements the list has, hence the number of words, num_words.
num_words = len(words)
print("The number of words is ", num_words)
Next, by using the same method, we find out the number of lines. We do the same thing, except here we split on the newline character /n.
The newline character is the code that tells the editor to insert a new line, a return. By counting the number of newline characters, we can get the number of lines in the program, len(lines):
lines = data.split("/n")

print("The lines in the text are:")
print(lines)

num_lines = len(lines)
print("The number of lines is", num_lines)
Run the count_words.py file and see the results:
The words in the text are:

['STRAY', 'BIRDS', '\nBY', '\nRABINDRANATH', 'TAGORE', '\n\nSTRAY', 'birds', 'of', 'summer',
'come', 'to', 'my', '\nwindow', 'to', 'sing', 'and', 'fly', 'away.', '\n\nAnd', 'yellow',
'leaves', 'of', 'autumn,', 'which', '\nhave', 'no', 'songs,', 'flutter', 'and',
'fall', 'there', \nwith', 'a', 'sigh.']

The number of words is 34

The lines in the text are:

['STRAY BIRDS ', 'BY ', 'RABINDRANATH TAGORE ', '', 'STRAY birds of summer come to my',
'window to sing and fly away. ', '', 'And yellow leaves of autumn, which ',
'have no songs, flutter and fall there ', 'with a sigh.']

The number of lines is 10
Now open the file birds.txt and count the number of lines by hand. You will find the answers are different. That is because there is a bug in our code. It is counting empty lines as well. We need to fix that now.
Count lines fixed
This is an old code, we need to correct it as well:
#!/usr/bin/python

f = open("birds.txt", "r")
data = f.read()
f.close()

lines = data.split("\n")
print("Wrong: The number of lines is", len(lines))
We use here loops. They are needed to execute a sequence of statements multiple times in succession. We will deal with a particular a counted loop. It is built using a Python for statement.
A Python for loop has this general syntax:
for <counter> in <sequence>:
<do something>
- <do something> is the body part of the loop and it can be any sequence of Python statements.
- <counter> is called the loop index, it takes on each successive value in the sequence and the statements in the body are executed once for each value.
- <sequence> portion consists of a list of values.
There is a colon (:) after the instruction. In Python, there are no curly braces {}. If you come from C/Java world, you had to use curly brackets instead of colon sign:
for(i=0; i <10; i++)
{
<do something here>
}
The curly braces tell the compiler that this code is under the for loop. Instead, in Python we use an indentation. Usually four spaces as an indentation is recommended.
If we do not use indentation, we will get an error:
for i in range(5):
print(i)


    print(i)
        ^
IndentationError: expected an indented block
The correct way to do so is:
for i in range(5):
    print(i)
We would like to use the looping over our lines. The counter l will contain each line as Python is looping over them.
for l in lines:
Now, we have each line. Moreover, we should also check the emptiness of the line. The not keyword in Python will automatically check for the emptiness:
if not l
It is the same with the command
if len(l) == 0
If the line is empty, we should remove it from the list using the remove() command:
if not l:
   lines.remove(l)
At the end, it will look like:
for l in lines:
    if not l:
       lines.remove(l)
When we run count_lines_fixed.py, we see the corrected result as well:
Wrong: The number of lines is 10
Right: The number of lines is 8
Bringing it all together
Now we need to tie it all together and call our final file as a word_count.py.
Python lets us put a sequence of statements together to create function. Firstly, we are defining (def) a new function and we are naming it foo. The following lines are indented to show that they are part of the foo function:
def foo(<input>):
    <do something>
    return <value>
Our first function counts the number of words:
def count_words(data):
    words = data.split(" ")
    num_words = len(words)
    return num_words
Second function counts the lines:
def count_lines(data):
    lines = data.split("\n")

for l in lines:
    if not l:
       lines.remove(l)

num_lines = len(lines)
return num_lines
We read the data from the file:
f = open(birds.txt, "r")
data = f.read()
f.close()
We call our functions to count the numbers of words and lines and print the results.
num_words = count_words(data)
num_lines = count_lines(data)

print("The number of words: ",  num_words )
print("The number of lines: ", num_lines)
We should get:
The number of words:  34
The number of lines:  8
Commit & Push
Commit your changes and push them to Gitlab.
Congratulations, you wrote your first python script